

Waste residue left on finished blanks is one of the most frustrating issues in a packaging production line. You run a job, the die-cutting section performs perfectly, but when the sheet exits the stripping unit, small bits of waste material remain attached to the product—sometimes around the edges, sometimes in the internal cutouts. The result: manual rework, slower production speeds, and compromised product quality.
For operators running an automatic die-cutting machine, this problem tends to appear gradually. A few scraps here and there might not raise alarms immediately. But over time, as the stripping system struggles to keep up, the accumulation of waste residue can eat into your yield and create downstream headaches. The good news is that most stripping residue issues are preventable—and fixable—without expensive upgrades.
What Causes Waste Residue in the Stripping Process?
To solve a problem, you first need to understand where it comes from. Waste residue in the stripping process of an automatic die-cutting machine typically traces back to one of several root causes.
Stripping pin alignment and height. The stripping pins are designed to push waste material out of the die-cut sheet at the right moment. If the pins are set too low, they won't make sufficient contact with the waste. If they're set too high, they can damage the sheet. Even a 1mm offset in pin placement can leave scrap attached to the finished product.
Waste tie dimensions. The small connecting bridges—or "nicks"—that hold waste in place during cutting need to be the right size for the stripping unit to handle. Ties wider than 1.5mm almost always cause incomplete stripping. The waste simply won't break cleanly, leaving residue behind.
Worn or incorrect tooling. Stripping pins that are not sharp or hardened lose their effectiveness over time. Rubber ejectors wear out. When tooling degrades, the stripping action becomes inconsistent, and residue is the predictable result.
Timing and synchronization issues. The stripping action must be precisely timed with the machine's cycle. If the timing is off, the pins may be pushing against material that's still partially attached—a sure recipe for incomplete waste removal.
Material-related factors. Paper stock with inconsistent moisture content, excessive static electricity, or variations in thickness can all interfere with clean stripping.
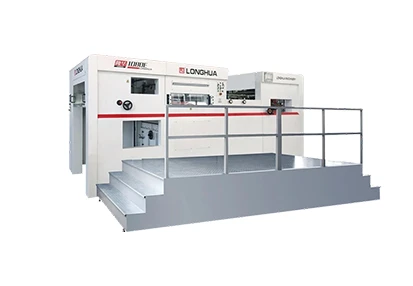
Practical Steps to Reduce Waste Residue
Once you've identified the likely cause, the next step is addressing it systematically. Here are the most effective measures for keeping waste residue under control on your automatic die-cutting machine.
Start with the Die Design
The most effective waste reduction strategy begins before the sheet even enters the machine. Work with your die maker to ensure that waste ties are kept within the 0.5–1.0mm range. Ties that are too thick simply won't break cleanly in the stripping unit, no matter how well your machine is set up.
Properly placed nicks and waste ejection channels in the die design make a significant difference. A well-designed die anticipates the stripping process, not just the cutting process.
Set Stripping Pins Correctly
Pin height adjustment is one of the most overlooked variables in waste residue prevention. If you're dealing with incomplete stripping, try lowering the pins in 0.5mm increments until the waste pops off cleanly. This incremental approach helps you find the sweet spot without over-adjusting.
Also verify that the pin pattern aligns with the waste bridges on your die. If the pins are offset, the blanks won't release cleanly. Run a test strip and observe the waste removal pattern—this simple step often reveals misalignment issues immediately.
Maintain Your Tooling
Stripping pins and rubber ejectors are wear items. They degrade over time, and the performance of your automatic die-cutting machine will reflect that degradation. Inspect tools regularly—every 500 operating hours is a reasonable benchmark—and replace any components with visible wear.
Keep the stripping area clean. Foreign objects falling into the die-cutting area can cause channel misalignment, which in turn leads to uneven stripping performance.
Control Material Conditions
Paper stock behavior changes with humidity and temperature. Sheets that are too dry generate static electricity, causing waste to cling to the stripping pins instead of falling away. Sheets that are too moist may swell and alter the cutting dynamics.
Maintain consistent material storage conditions, and consider the optional water spray device available on some automatic die-cutting machines to manage surface conditions during high-speed runs.
Use the Machine's Adjustment Capabilities
Modern automatic die-cutting machines offer micro-adjustment capabilities for stripping stroke force, pin velocity, and material support. These settings aren't just for show—they allow you to fine-tune the stripping action for different paper grades and product geometries.
If your machine has a second stripping system designed to clean up waste edges including the gripper margin, make sure it's properly calibrated. Secondary stripping systems can significantly reduce residue when set up correctly.
When Residue Persists: A Systematic Approach
Sometimes you've checked the pins, verified the die design, and adjusted the settings—yet waste residue still appears. At this point, a more methodical troubleshooting approach is warranted.
Run a test with a different paper stock to isolate material-related variables. Check the machine's timing synchronization—if the stripping action is happening even slightly out of phase, residue will follow. Inspect the gripper system for any issues that might affect sheet positioning during stripping.
And don't overlook the basics: ensure that waste removal holes are appropriately sized. If the holes are too large, the entire die-cut product can scatter during waste removal. If they're too small, waste will clog the channel.
Summary
Waste residue in the stripping process doesn't have to be an accepted cost of doing business. Most residue issues trace back to predictable causes—pin alignment, tooling condition, die design, or material variables—and each of these can be addressed with systematic attention.
What to take away:
- Check pin height and alignment before running any job. Even small offsets cause residue.
- Keep waste ties narrow—0.5 to 1.0mm is the sweet spot for clean stripping.
- Replace worn tooling regularly. Stripping pins and rubber ejectors are consumables, not permanent fixtures.
- Match machine settings to the material. Use the micro-adjustment features available on your automatic die-cutting machine.
- Don't ignore the die design phase. Clean stripping starts with a well-designed die.
Have Specific Production Challenges with Your Automatic Die-cutting Machine?
Every packaging line has its own quirks—different paper stocks, unique product geometries, varying production targets. If you're dealing with persistent waste residue or any other stripping issue, we're here to help. Our team can discuss your specific setup, recommend adjustments, and provide guidance on optimizing your automatic die-cutting machine for cleaner, more consistent output.

